DM Screen
The DM screen is the heart of the expansion. Here you have all the important info about the players in one overview. In addition, the table can be customized with any attributes and the character sheet can be accessed directly. Everything can be done here that is also possible on the original character sheet. Even Beyond20 works here.

You can open the DM Screen by clicking on the DM Sceen button in the Campaign Overview.

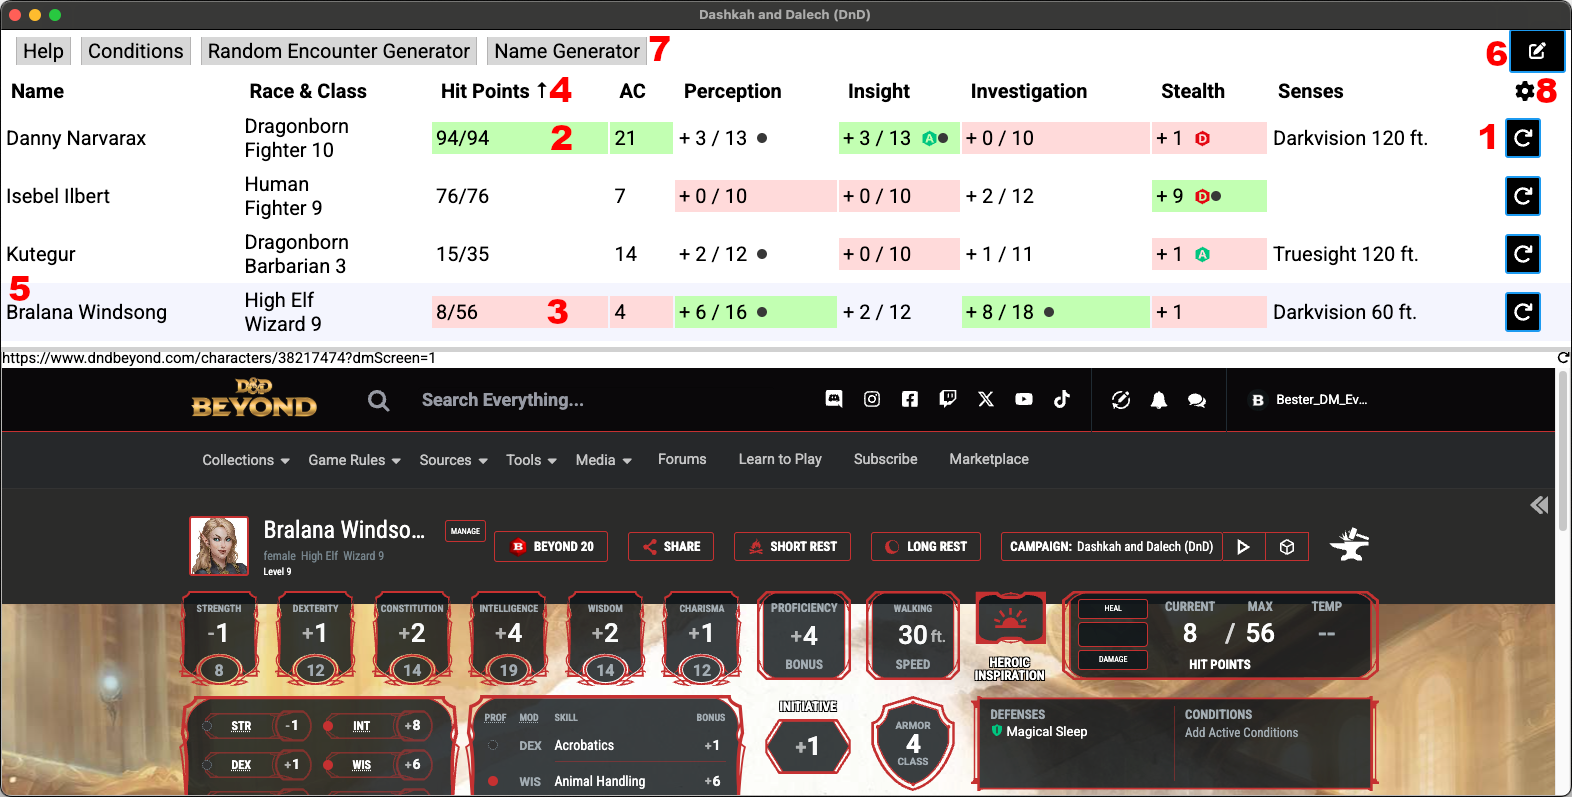
- With the button in the right column you can reload the values. This takes a few seconds, but is helpful if something has changed in the meantime. An automatic update of the values does not happen.
- The highest value within a column is marked green. This only applies if the column has a numerical sorting.
- Likewise, the lowest value is also marked in red. If several values have the lowest (or highest) value, all are marked.
- It is possible to sort by the individual columns if they have alphabetical or numerical sorting.
- Clicking on a row automatically opens the corresponding character sheet in the lower half. The open character is indicated by a bluish background. The height of the table and the opened character sheet can be adjusted by dragging.
- You can use this button to add and edit links at the top of the character table. These will either open below the table, similar to the characters, or in a new tab. Note that a website operator can set whether links can be displayed embedded or not. This may mean that not all links can be displayed below the table.
- The links you have added appear here. By default, a few links are already preselected, but you can also edit or delete them. Links that are loaded below the table are preloaded and retain their status even if you open the link again. This also makes it suitable for encounter trackers and the like. If the link does need to be reloaded, use the reload icon on the right below the table.
- You can open a few settings via the gear wheel. On the one hand, you can open the help or report an error. You can also set the theme, the language and whether the screen should be opened in a tab or as a pop-up.
Customizations
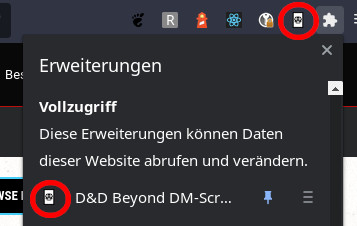
If you have a character sheet open, press the extension's icon in the upper right corner of the browser to open the settings. Sometimes the icon is hidden behind the puzzle piece.

 A dialog opens where you can add, edit and delete attributes.
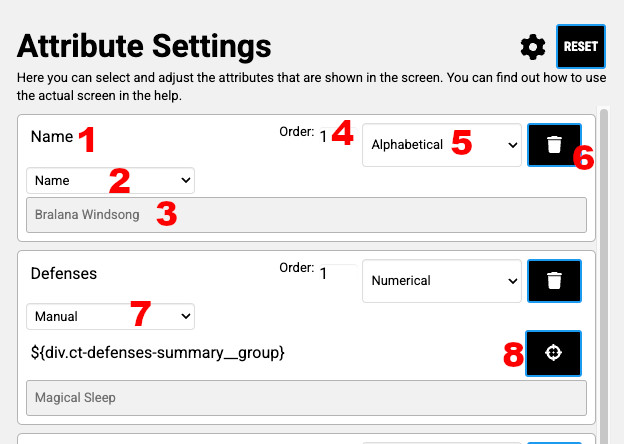
- customization.attribute-name
- In this select you have a preselection of many different attributes. If you change the value, the name and the sorting will adapt automatically. A special entry is the last value, "Manual". With this you can define your own attributes. You can find more about this below.
- The gray box shows you the value of the current character. This will be displayed later in the DM screen in the corresponding column for each character.
- The order indicates at which position the column is displayed in the DM Screen. Smaller orders are displayed first. If two attributes have the same order, they are displayed in the same order as they were created.
- Here you have the choice how the characters should be sorted in the table, if you sort the DM Screen by this column. If you select "No sorting", then the column cannot be sorted. If you select "Alphabetical", the column will be sorted alphabetically. If you select "Numeric", it will try to convert the value into a number and sort the column by it. This also marks the highest and lowest values. When converting to a number, from the beginning of the text only characters that belong to a number are considered, until characters come that can no longer be converted to a number. For example, the hit points that have the value "113/113" will come out with the number 113, because "/" cannot be converted into a number.
- Use the button at the end to remove the corresponding attribute from the DM Screen.
- If you select 'Manual' as the attribute, you can define the value of the attribute yourself. You can find out exactly how to do this below.
- You can use the button to select elements whose values are then displayed on the screen. The button is only visible for manual attributes. You can find out more about this below.
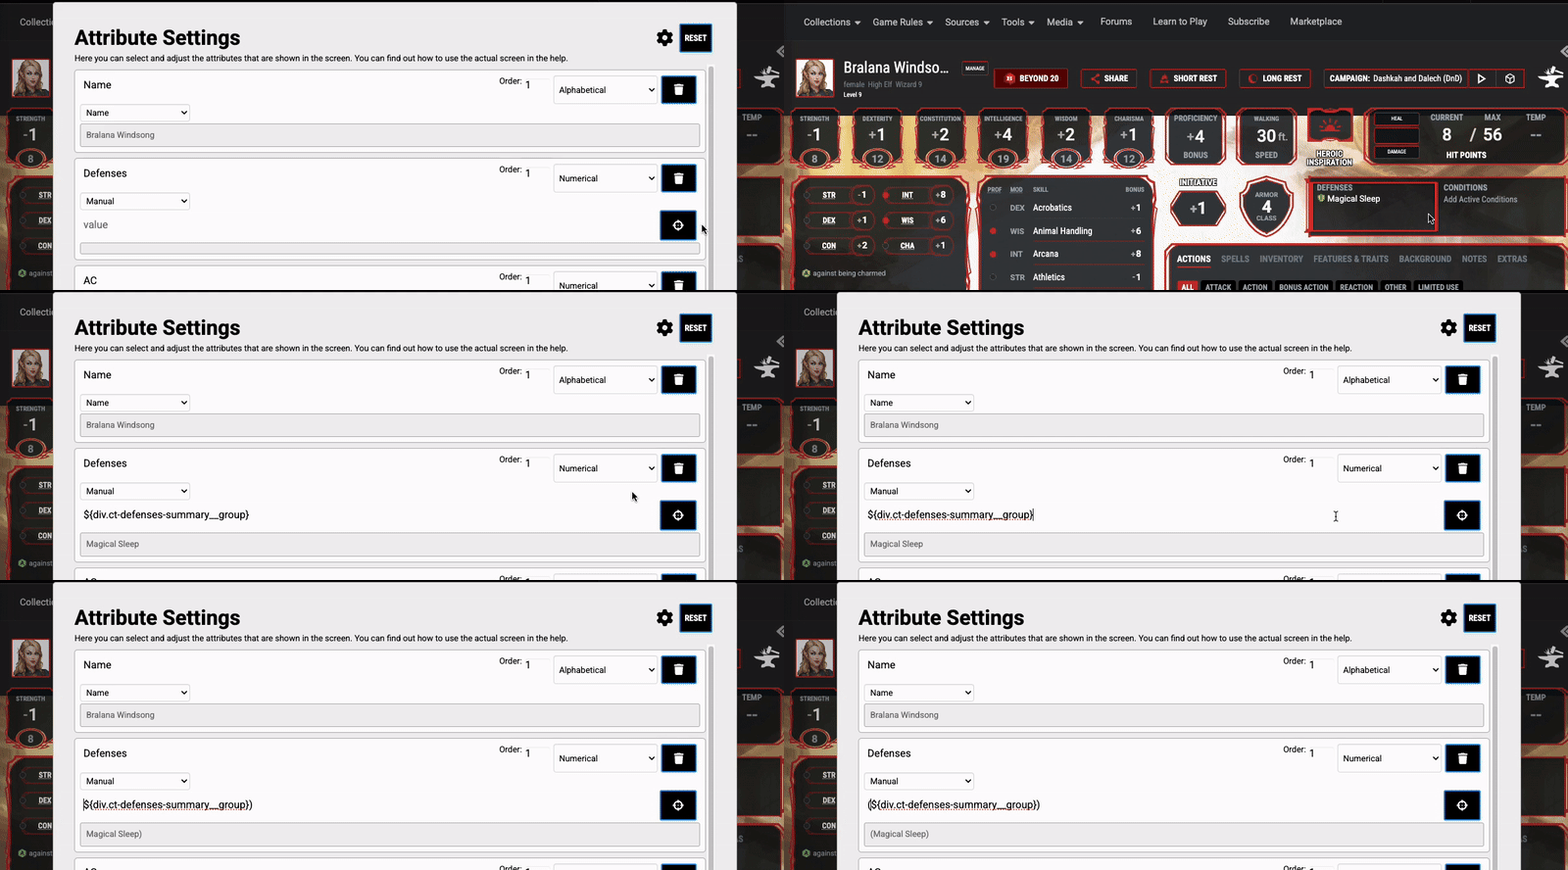
You can define and display attributes yourself. The information for this is taken directly from the website and not from any APIs. This way you can be sure that the information will never be calculated incorrectly. However, the tapping is time-consuming and therefore there is no automatic update of the values. There are two limitations for selecting attributes: The value finder in the Screen acts as if the browser is maximized over the full screen. Since the web page is displayed differently when the browser is smaller, you may get errors if you select values and your browser is not maximized. The second disadvantage is that only values visible at the start can be selected, so no values inside popups, sidebars or similar. To add manual attributes, first select "Manual" from the list at the bottom. This will bring up a new line where you can enter the value. Text inside ${ } will be used as CSS-Selectors and will be replaced with the element-value, but you don't need to know what that is to use it. Just press the crosshair-button behind the line and select the corresponding value with the mouse. The value will also be outlined in red so you can see what you're selecting. In the manual attribute you can also add normal text or HTML tags (notice how the normal brackets appear in the preview at the end). These will be taken over and so a light styling like line breaks is possible. In the video on the right you can see again how exactly you can select values.
